Insurance
Insurance is stored at the visit level.
Insurance from previous visits can be copied into a new visit.
There are 5 tabs that comprise the Insurance information:
- Payer Information
- Subscriber Information
- Authorization Information
- Network Information
- Military & Worker's Comp
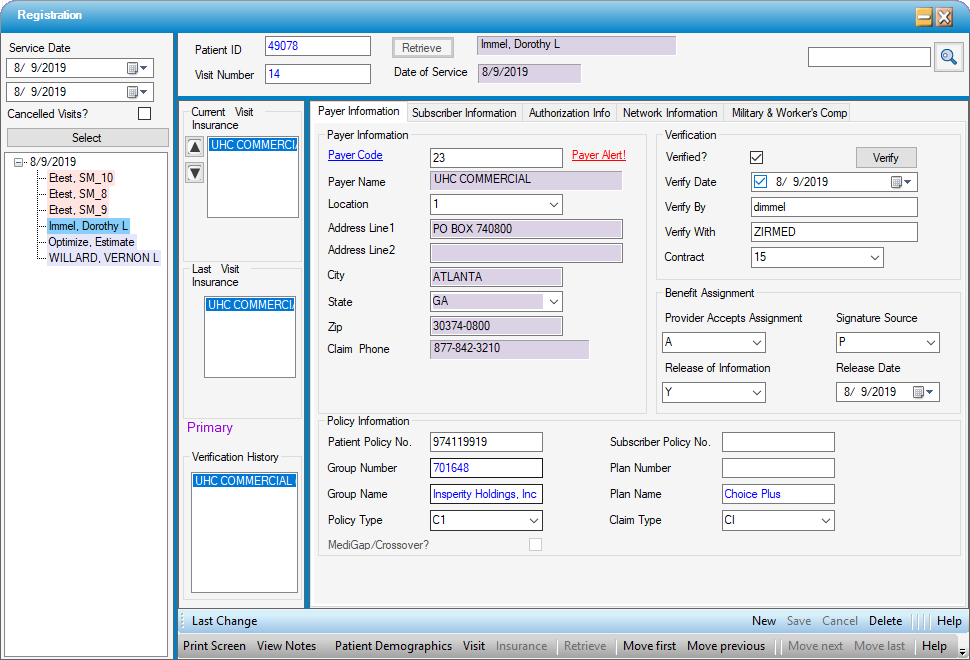
 Payer Information
-
When the form opens, insurance entered in the Appointment will populate and the Contract will populate with the default contract (if one has been selected) from Payer Configuration. Users can enter or edit the contracts in the Payer Information tab. Depending upon whether contract selection was restricted in Payer Configuration, users may be able to select from all contracts or only those mapped to the Payer entered.
-
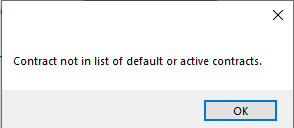
If the contract entered in Payer Configuration has been discontinued, an alert will be invoked indicating "Contract not in the list of default or active contracts." When the OK function is selected to close the alert, the Contract field will be cleared to prompt the user to select an active contract.
-
If the date of service scheduled is not within the effective date range of the contract selected, an error ball will be invoked with a hover message indicating that the contract is not valid.

-
-
Select a Location from the drop-down. This selection is required for transmission of clean claims.
- Add new payers by selecting
 New.
New. - Once all relevant information has been entered and saved, the payer will be listed to the left under Current Visit Insurance.
NOTE: For self-pay patients, leave Payer Code, Payer Name, and Patient Policy No. blank. There is no need to enter data in any of these fields. The moment a visit is scheduled, the system assumes that there will be charges associated with that visit and designates the visit as self-pay. It will remain in self-pay status (Payer 1) until another payer is added. Manually entering "self-pay" in these fields may prevent the visit from being enabled for the entry of charges in the Charge Entry form!
- If a Payer Alert has been entered in Payer Configuration for the payer entered, a red hyperlink will appear. Clicking on the hyperlink will open the alert.
- If the payer address is not available from the Location drop-down, it can be entered manually on this tab. Additional Locations must be added via Payer Configuration > Location tab to be available for use in the future. (Keep in mind that, to select a Location that has just been added in Payer Configuration, it may be necessary to right click on the drop down and select
 in order to see and select the new location.)
 - Change payer priority by selecting a payer and using the
 Insurance (up) or
  Insurance (down) button next to the Current Visit Insurance box.
NOTE: If charges have been entered, for either payer, it will be necessary to reverse the charges in order to make corrections to the payers in this tab.
- If the patient has had previous visits, the Payer from the most recent visit will be listed in the Last Visit Insurance box. After selecting New , double-click on the desired insurance to copy it to the new visit. (The Authorization and Verification information will not be copied as this is visit specific.)
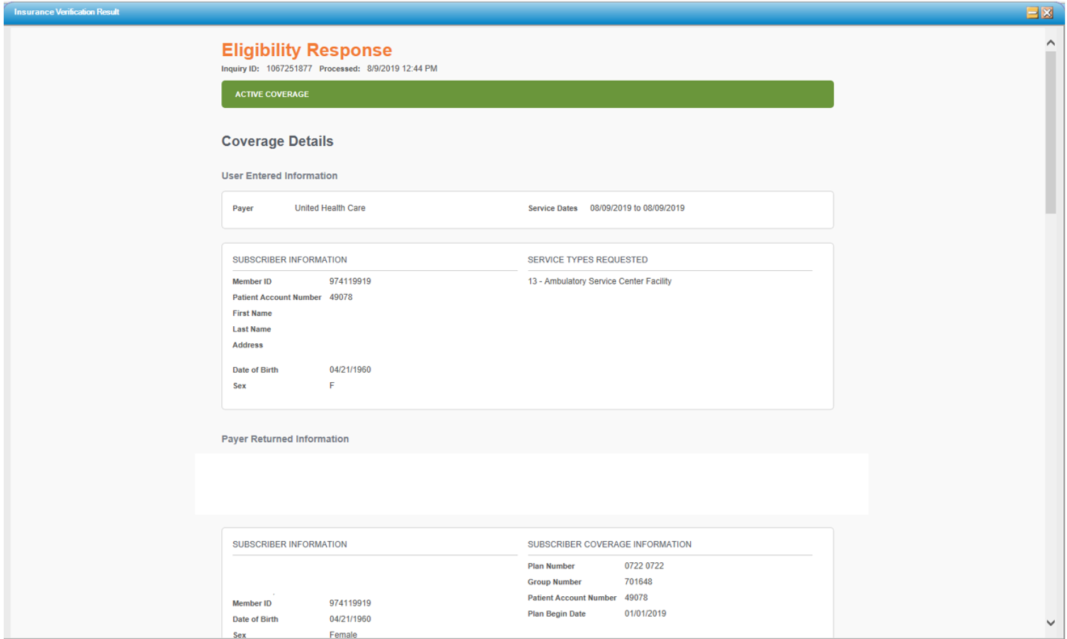
- If an eligibility request has been transmitted directly to the clearinghouse, there will be another box below the Last Visit Insurance box labeled Verification History that will list any payer for which insurance verification information exists Double click the payer name to view the eligibility response document.
- Medigap/Crossover? should be used to indicate that the secondary (or greater) insurance will crossover to the next payer on file directly from Medicare. (It is not enabled for primary payers.) Checking this box will enable the system to flag all payers as billed at the time of charge entry so that Workflow tasks are not created when subsequent payers are not billed at the time of primary payer payment posting.
- Policy Type and Claim Type default to the value in the Payer Configuration but can be added or edited here. These are required fields for electronic claim submission.
Double click on the payer name within Verification History to see details in a pop-up.
NOTE: The functionality of the Verification section varies depending upon whether centers are contracted to utilize HST Clariti, Waystar Real Time Elibility, or other vendors and services. Please see the Help File specific to Insurance Verification for further instructions on how to perform this function in HST Practice Management.
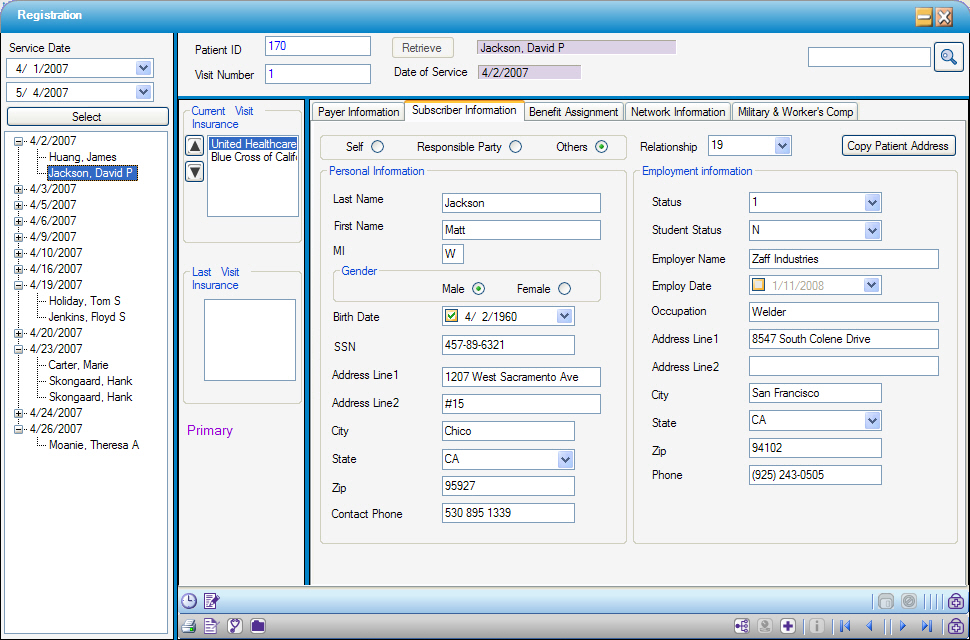
Subscriber Information
- The Relationship codes seen in the drop-down are standard codes defined by HIPAA. When completing this tab, the relationship entered is the patient’s relationship to the subscriber. For example, when a child is the patient and the subscriber is the mother, the relationship code is 19 for ‘Child’, because it is the patient’s relationship to the person who has the insurance policy.
- The system will default to Self as the Guarantor with a Relationship code of 18-Self . By clicking the Other or Responsible Party radio dial the Guarantor can be changed. When these radio dials are selected, the Relationship will automatically clear and an error ball will appear as a reminder to update this field with the appropriate code.
- Selecting Self
 will default the patient information (address, employment and demographics).
 - Selecting Responsible Party
 will default the information from Visit: Responsible Party tab. The Responsible Party radio dial will only be available if a Responsible Party was entered in Visit: Responsible Party.
 - Click
 if the Subscriber or Responsible Party has the same address as the patient.
 - When selecting Others, the demographic information will need to be entered for the subscriber.
 is still an option.
 - For example, the mother of a child may be financially responsible for any money that is due on an account after the insurance has paid - the Responsible Party. However, the father holds the insurance policy under which the child is covered - the Subscriber. In this case the mother would be entered under Visit: Responsible Party and the father on the Subscriber tab as Other.
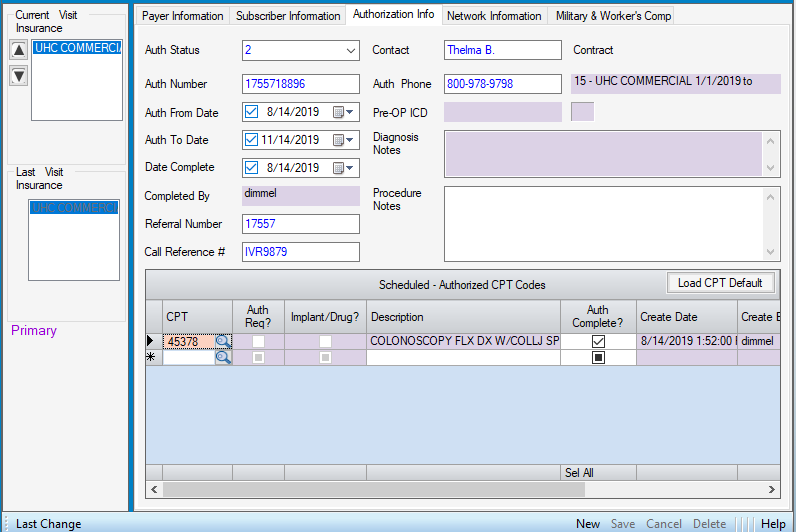
Authorization Info
The Authorization Info tab is part of a complete Authorization process which includes the Appointment, Patient Estimator, Charge Entry, and Workflow tasks. Please click the hyperlink to review the entire process.
Network Information
Once current insurance benefits have been verified with the payer, they can be entered on this tab. Any data entered on this tab, will be pulled into the Estimator form and utilized to calculate Patient Responsibility.
Click the Estimate button to open the Patient Estimator form.
.png)
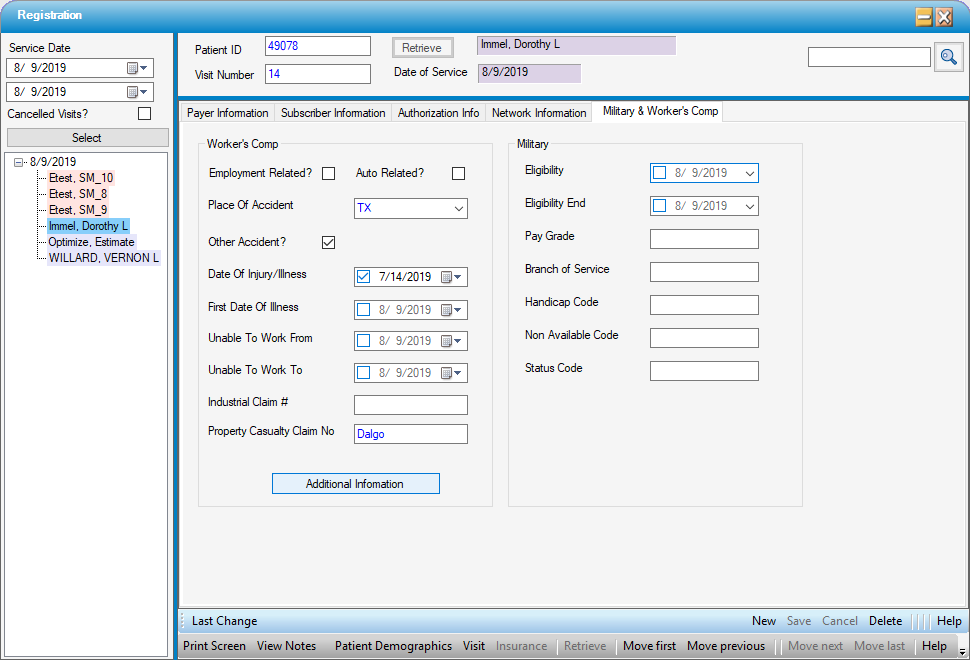
Military & Worker's Comp
Information relative to third party payers, such as workers compensation or automobile related claims, can be entered on this tab. NOTE:Information entered here is informational only. For a date of injury to appear on a claim, it must be entered on the Additional Information tab in Charge Entry, under Occurrence Codes, which can be accessed from this form by selecting  .
.
Information specific to the treatment of active duty military can also be entered on this tab.