MFA - Before You Begin
Before enabling Multi-Factor Authentication, answer these questions and formulate a roll out plan. Proper planning and User Profile set up will reduce access issues for users once MFA has been implemented. This Q & A can also be used as a planning checklist.
For detailed set up for MFA, please visit the Configuring Multi-Factor Authentication help file.
What is Multi-Factor Authentication?
Multi-Factor Authentication provides enterprise an additional layer of security for user log ins, as it requires the user logging in to provide an additional verification method. When enabled, users will be required to enter a One Time Passcode that they receive via Text or Email into an Authentication Required form after entering their User ID and Password.
Should all Centers automatically be opted in for MFA initially?
If the Enterprise is comprised of many centers, turning each center on gradually, may help to limit the initial influx of calls to the support desk while users are getting accustom to the changes.
To enable centers gradually:
- Enterprise MFA Settings: Enable ON, Require for All Centers OFF
- Center MFA Setting: Enable as needed.
To enable All centers at the same time:
- Enterprise MFA Settings: Enable ON, Require for All Centers ON
Do all users have a valid notification method (Email or Mobile Phone) in User Profile?
Before turning on Multi-Factor Authentication, be sure to verify that all users that will be logging in have at least one (1) valid method (Email or Mobile Phone) for receiving their Multi-Factor Authentication One Time Passcode on the first log in.
The system will attempt to use the default Notification Method chosen in Enterprise Configuration. For example, if Email is the default setting in Enterprise Configuration, and a user ONLY has a Mobile Phone number and no Email, it will switch to Mobile Phone (Text) as the method for the first log in attempt.
After the first successful log in, the user may select their alternate notification method the next time they authenticate if that notification method is not blank on the Authentication Required dialog.
Are there any employees associated to more than one User Profile?
Verify that employees are only associated to 1 User Profile. This will save time later when updating a user profile that is associated to an employee with multiple user associations.
1. Run the Utility – Data Export - User Profile Export.
2. Open the output file and sort the entire spreadsheet by the Employee ID column.
a. Click the upper left margin square (above row 1 to the left of A)
to highlight the entire spreadsheet.
b. Click on Data, then Sort
.
c. Check the box “My report has headers”.
d. Select Employee ID in the drop down and Click OK.
3. Highlight the Employee ID column.
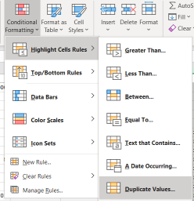
a. click on Conditional Formatting on the Home tab
b. select Highlight Cell Rules
c. then Duplicate Values.
4. When the Duplicate Values dialog comes up, take the defaults, and click OK.
5. Duplicate records will appear in red background with red text. This makes it easy to see the duplicates.
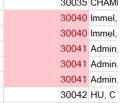
6. Find the red values (by visually scanning the report or filter the column for red backgrounds) and determine which Users Need to have the Employee ID removed and remove it manually from that User ID via User Profile.
7. Repeat this process until all duplicates are removed.
Are there User Profiles that need to have their phone number and email updated?
Use these steps to update User Profiles with the emails and mobile phone numbers from their linked Physician and Employee records if they are missing or need to be updated.
1. Make sure manual cleanup of Employee IDs has been completed first, then re-run the User Profile Export for a fresh list.
2. Review the spreadsheet and determine if there is an attached Employee or Physician and if the Mobile Phone should be copied from one of these columns to the User’s Mobile Phone column.
3. Check the Emails for linked Physicians and Employees. If the User Profile Email needs to be updated to one that is in a linked Physician or Employee, copy that value to the user’s Email address column.
4. If there are no linked Physicians or Employees for a User that does not have a Mobile Phone and/or Email, it may be necessary to export a list from another company system (Active Directory, HR Info, etc.) that does have the User’s Mobile Phone and Email. Copy and paste the data to be updated into the Export spreadsheet.
5. Make any other manual updates to the template to be imported as required.
6. Once the spreadsheet is fully updated, use the Utility – Data Import – User Profile (Import or Update) option to first Validate then Import the updated data.
7. If Validation errors occur, they need to be fixed before the spreadsheet can be imported.
8. Verify that the imported or updated data is visible from the application and matches the data imported.
It is also possible to import new users using this Data Import template.
PLEASE NOTE:
• Columns that display Physician and Employee Name, Mobile Phone and Email DO NOT IMPORT. These columns are for informational purposes only and can be used for updating the User Profile Mobile Phone and Email by copying and pasting them to the applicable column.
• BLANK columns DO NOT overwrite existing data when the sheet is imported.
Is the Center > CTR Administration Number populated? If not is the Center > General Number populated?
When a user is presented with the Authentication Required dialog, there is a message that appears on this dialog to give the user some guidance in the event they may be having issues logging in. The phone number displayed first pulls from the Center > CTR Administration Phone Number and if that is blank will pull from the Center > General Phone Number. If neither of these phone numbers are populated, no phone number will show on the dialog.
Who is the person that will field issues for Multi-Factor Authentication?
Make sure the person or people that will be fielding calls for MFA issues understand the set up and how this feature and the various functions work within HST Practice Management. Ensure the personnel that may need to reset a user’s locked account have access to the User Profile form and have access to Reset Passwords.