Workflow
Operation > Workflow
The Workflow Manager is a configured task manager. Managers may assign specific tasks to staff in Administration > Configuration > Workflow Configuration. Employees can work from a daily list of assigned tasks.
Assignment and completion of tasks will create a system generated note on the patient's account.
Task Filtering tab
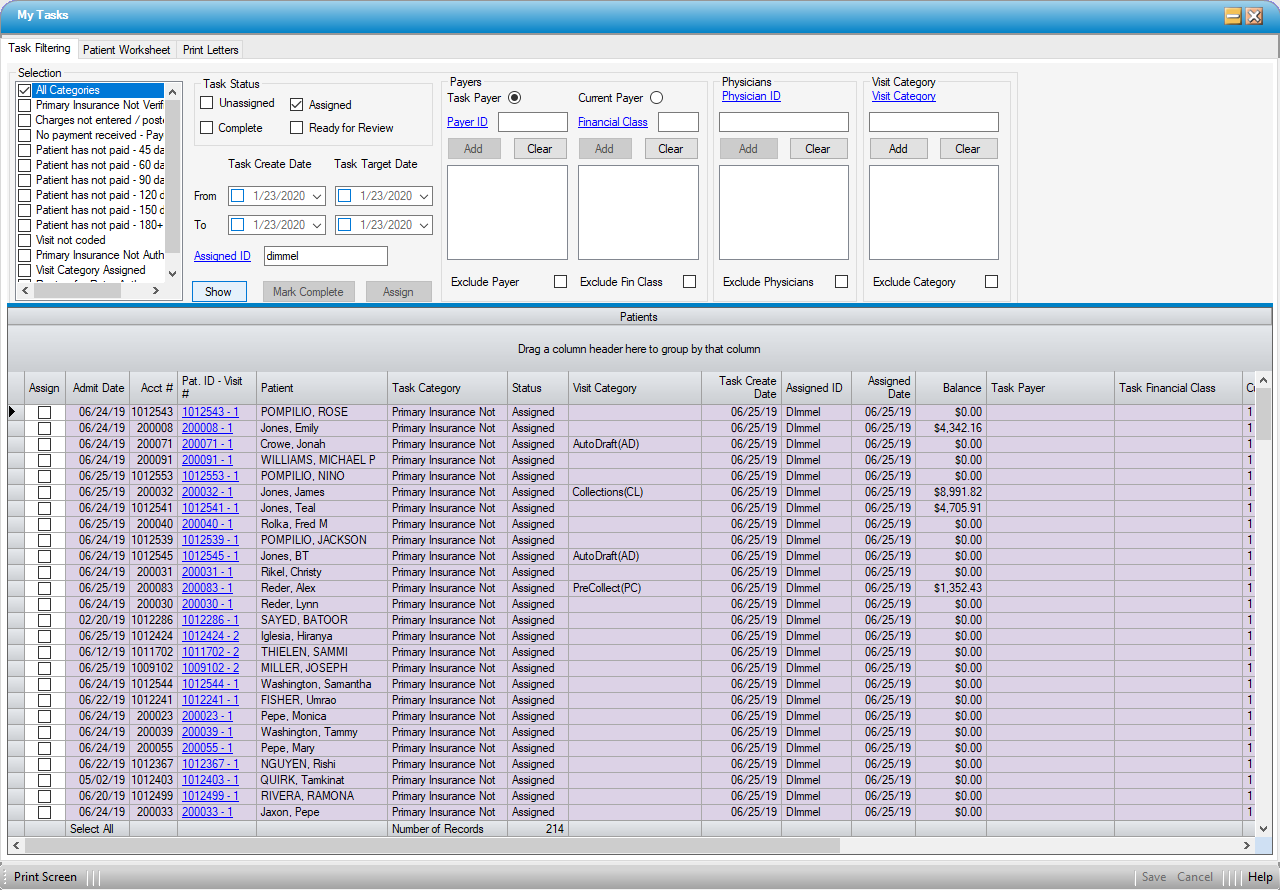
When the form is opened, Selection will default to All Categories. Task Status will default to Assigned, and the Assigned ID will default to the user logged in. To populate the Patients grid with all categories assigned to that user, simply select  .
.
Selection
This section will reflect all tasks selected for inclusion in Workflow Configuration. Available selections are listed below. A user may elect to leave the default at All Categories and work all assigned tasks, or the individual check boxes can be selected to work one or more categories at a time.
Tasks will be created if the criteria (triggers) indicated have not been met within the number of days designated in Workflow Configuration.
- Primary Insurance Not Verified - Verified? check box in Verification section of Payer Information tab has not been checked.
- Primary Insurance Not Authorized - Authorization Status in Registration > Insurance > Authorization Info tab is None or Auth Pending
- Unsigned Op Reports - The Signed by Physician check box is not checked in the Operative Report section of Case > Case History > General Information tab.
- Supply Used not posted - A supply is used but the transaction has not been posted.
- Charges not entered/posted - A case is still on the schedule, but charges haven not been entered and/or posted.
- Primary Claim not generated - Charges have been entered and posted, but a claim has not been generated.
- Primary claim not printed/sent - A primary claim has been generated, but has not been printed or transmitted.
- Primary payer paid. Secondary not flagged as current payer - A Primary payment has been posted, but the balance has not been transferred to the secondary payer.
- Primary payer paid. Patient not flagged as current payer - A Primary payment has been posted to a visit with no secondary, but the balance has not been transferred to the patient.
- Charges not entered for the secondary payer - The balance was transferred to the secondary payer, but they have not been billed.
- Secondary claim not generated - The secondary payer was billed, but a claim was not generated.
- Secondary claim not printed/sent - A secondary claim was generated, but has not been printed or transmitted.
- Secondary payer paid. Patient not flagged as current payer - A secondary payment has been posted, but the balance has not been transferred to the patient.
- No payment received - Payer - No insurance payment has been posted.
- No statement generated - Balance is due from patient, but no statement has been generated.
- No payment - 30 days since last statement - No payment has been received within 30 days of the last statement.
- Patient has not paid - 45 days - Patient has not paid for at least 45 days.
- Patient has not paid - 60 days - Patient has not paid for at least 60 days.
- Patient has not paid - 90 days - Patient has not paid for at least 90 days.
- Patient has not paid - 120 days - Patient has not paid for at least 120 days.
- Patient has not paid - 150 days - Patient has not paid for at least 150 days.
- Patient has not paid - 180+ days - Patient has not paid for at least 180+ days.
- Credit balance account - There is a credit balance on the Account.
- Primary Claim Denied - Primary claim denial was entered on a visit.
- Secondary Claim Denied - Secondary claim denial was entered on a visit.
- Tertiary Claim Denied - Tertiary claim denial was entered on a visit.
- Supply Used not entered - A supply was used but not entered.
- Visit Category Assigned - A visit category was assigned.
- Review for Retro Auth - The CPT codes entered in Charge Entry are not the CPT codes that were flagged as Authorized in the Registration > Insurance > Authorization Info tab.
Task Status
- Assigned is the default Task Status and will populate the grid with all tasks assigned to the Assigned ID.
- Unassigned can be checked and the Assigned ID removed to allow users to review tasks by category alone. Example, if a center has more than one Verifier, the task may be left unassigned in Workflow Configuration so that each Verifier can view all tasks under Primary Insurance Not Verified.
- Complete check box allows users to view completed tasks within the Patients grid.
- Ready for Review check box allows managers to view tasks that users have marked as Ready for Review rather than complete. Managers can then mark them complete upon review.
Task Create Date/Task Target Date
- Entering a date range for Task Create Date and/or Task Target Date allows users to further filter the available tasks by date created or target date.
Assigned ID
- The Assigned ID will default to the user who is logged in to the system, but this field can be left blank to review all outstanding tasks or a different Assigned ID can be entered or use the hyperlink to search by Last Name, First Name, User ID, or Status.
Payers
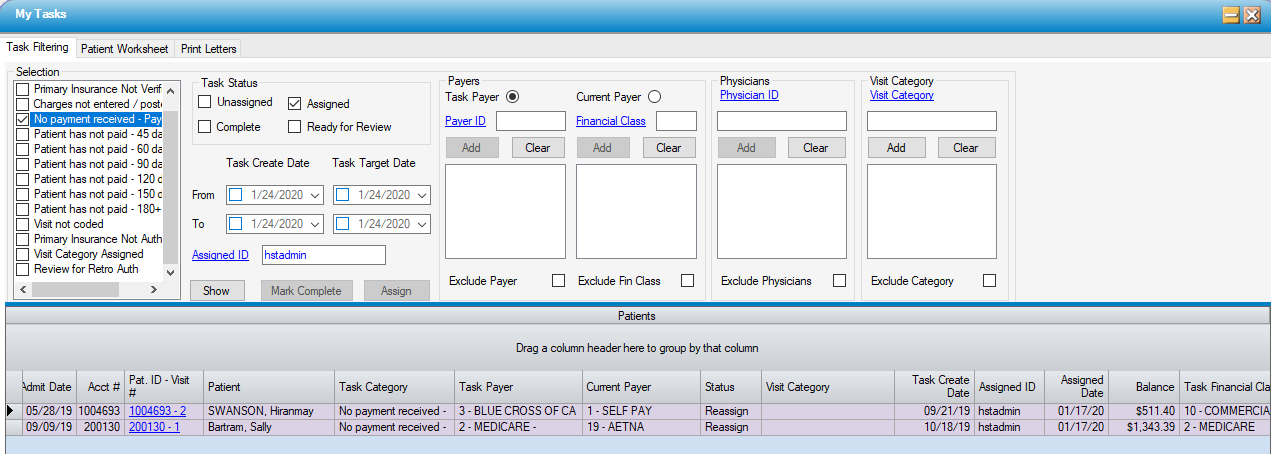
- Task Payer is the payer for which the task was assigned. Select this radio dial to work visits by the payer to which the task was assigned.
- Current Payer is the payer from whom the balance is currently due. Select this radio dial to work visits by the current payer.
NOTE: Discrepancies between these payers could be due to steps being omitted from the Accounts Receivable process. In the example below, one account was transferred to the secondary and the other to self-pay without having posted a primary payment or denial.
- Payer ID
- Enter the Payer ID or use the hyperlink to search by Name or Payer Code.
- Select
 . Repeat these steps to work additional Payers.
- Financial Class
- Enter the Financial Class or use the hyperlink to search by Description or Financial Class
- Select . Repeat these steps to work additional Payers.
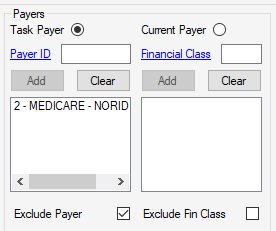
- Exclude Payer and Exclude Fin Class check boxes allow users to select a Payer or Financial Class and then exclude that selection from the Worksheet. An example of how this might be used is if a Verifier is working Primary Insurance Not Authorized and wants to exclude Medicare because the facility does not do any procedures for which Medicare requires authorization.
Physicians
- Enter a Physician ID or select the hyperlink to search by Last Name, First Name, Specialty Code 1, Status, or Default Role Desc.
- Select . Repeat these steps to work additional Physicians.
- Enter Physicians and check the Exclude Physicians check box to work tasks for all but the Physicians selected.
NOTE: This is a helpful tool when working the Primary Insurance Not Authorized task, since follow up may need to be made with the physician's office.
Visit Category
Visit Category is an Enterprise Table in Administration > Code Table Maintenance that is created and maintained by the organization. Categories are then assigned on the Visit Ledger tab in Billing > Patient Account.
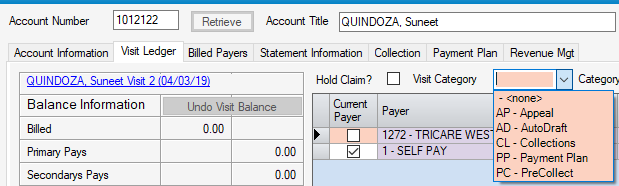
- Enter a Visit Category or use the hyperlink to search by Description or Visit Category.
- Select . Repeat these steps to work additional Visit Categories.
- Enter a Visit Category and check the Exclude Category check box to work tasks for all but the Category selected.
Once all Selections have been made, select  to populate the grid with the tasks that are due for those selections.
Patients grid
- Check the box in the Assign column and select the
 function to mark tasks complete directly from the Task Filtering tab.
 - Check the box in the Assign column and select the
 function to assign a task to a different user.
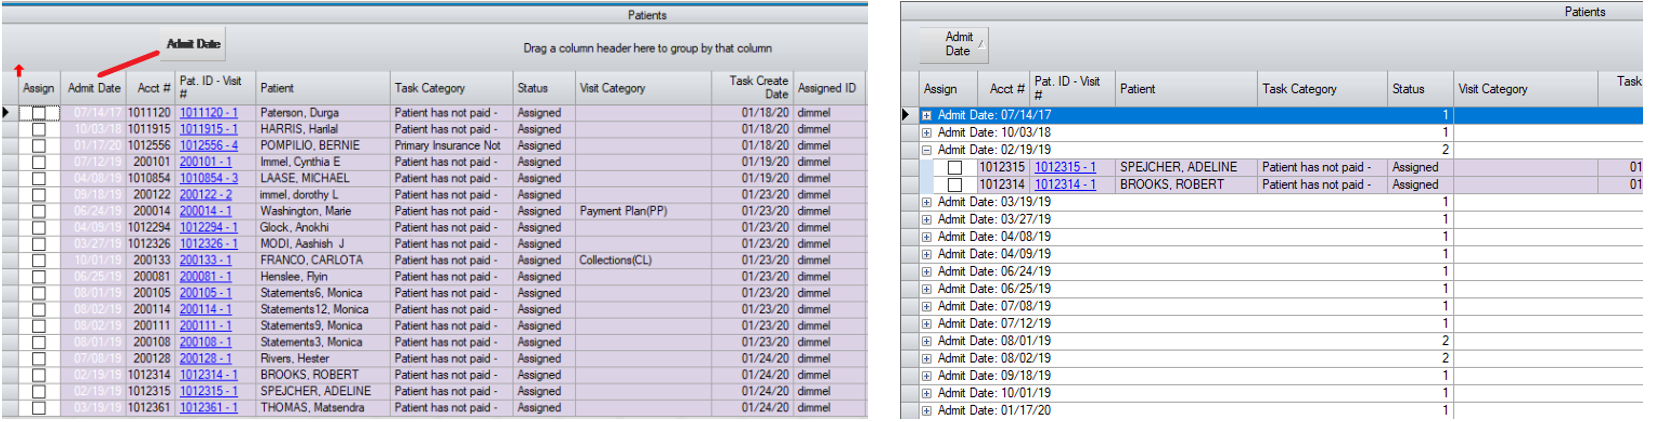
 - An example of how this may be used is in a facility with more than one Verifier: Workflow Configuration for Primary Insurance Not Verified may be set up without assigning to a user. The manager can then open Workflow each morning and sort by Admit Date, Patient, Task Payer, etc. and assign tasks to individual Verifiers based upon how the assignments are allotted at that facility. Simply check the box in the Assign column, enter the Assigned ID, and select the function.
- An example of how this may be used is in a facility with more than one Verifier: Workflow Configuration for Primary Insurance Not Verified may be set up without assigning to a user. The manager can then open Workflow each morning and sort by Admit Date, Patient, Task Payer, etc. and assign tasks to individual Verifiers based upon how the assignments are allotted at that facility. Simply check the box in the Assign column, enter the Assigned ID, and select the
- The Pat.ID -Visit # column has a hyperlink for each visit. If selected, the visit will be opened to work on the Patient Worksheet tab.
- Select any column header to sort the grid by that column.
- Sort columns by sliding the column header to a new spot in the grid.
- Group columns by dragging the column header to the location indicated.
- Once grouped, select the
 to view the visits that fall within each group.
- Once grouped, select the
Patient Worksheet Tab
If this tab is opened without changing the defaults in the Task Filtering tab, the tree view will reflect all tasks assigned to the user who is logged in: sorted by category. If changes have been made to the defaults on the Task Filtering tab, the tree view will reflect those changes.
- Select the
 to open the tree view category to work. The patients will display in alphabetical order by last name.
 - Double-click a patient name to open the task.
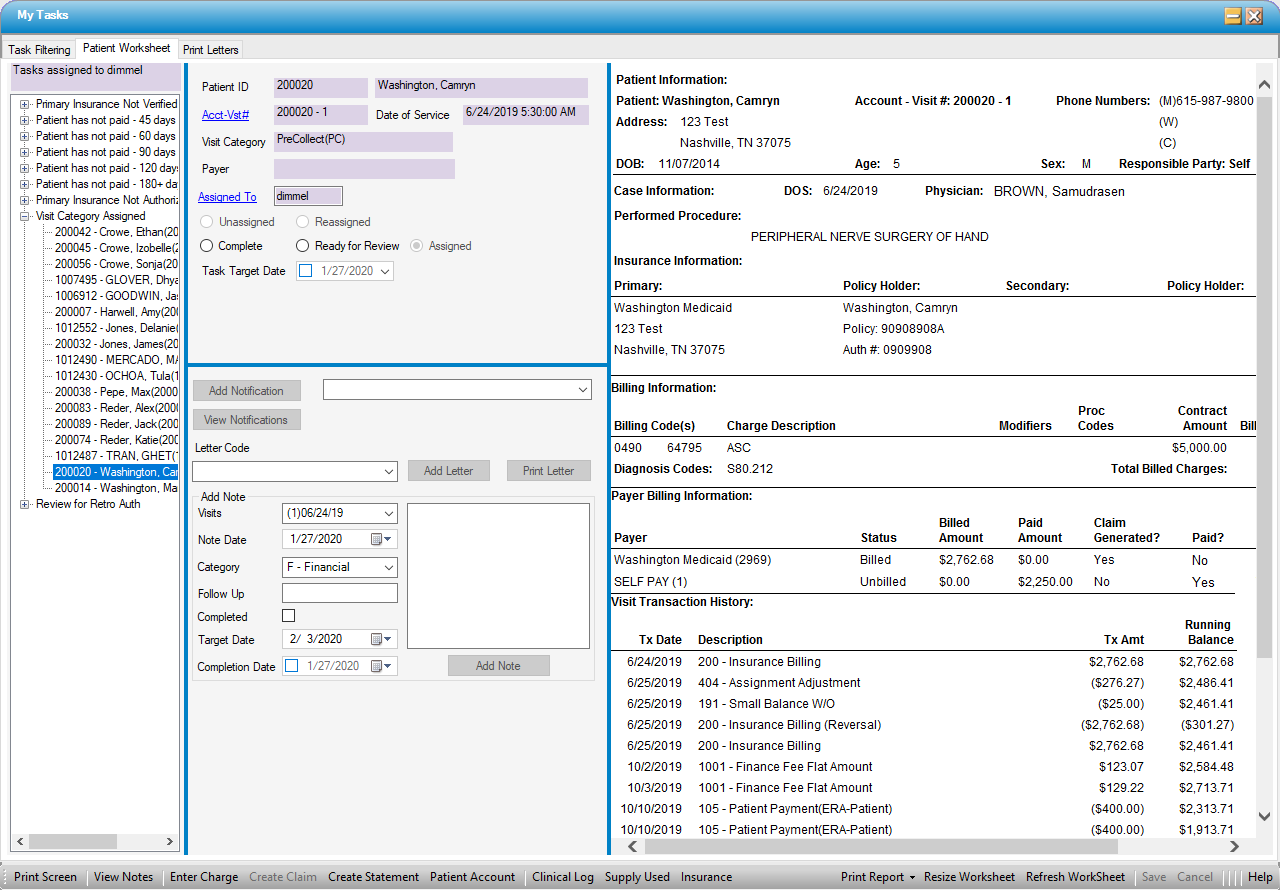
The top left portion of the worksheet will reflect basic information: Patient ID, Name, Acct-Vst#, Date of Service, Visit Category, and Task Payer.
- Acct_Vst# is a hyperlink that will invoke the Patient Account form.
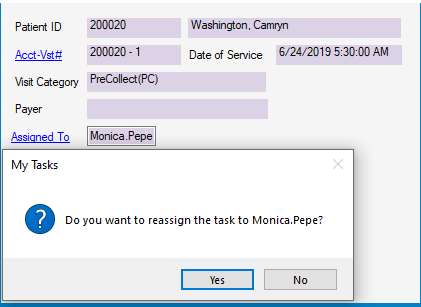
- Assigned To is a hyperlink that will allow the task to be assigned to another user.
- Enter the User ID or use the hyperlink to search by Last Name, First Name, User ID, or Status.
- A pop-up will request confirmation of the task reassignment. Select Yes to reassign. Selecting No will close the pop-up and no changes will be saved.
- Once a task has been worked, select the radio dial to either mark it Complete or Ready for Review, depending upon the center's policies and procedures. (A task marked Ready to Review can then be reviewed and completed by a lead or manager.)
- Task Target Date can be entered manually or selected from the drop down calendar to set a review date sooner than the configuration settings. For example, configuration is set up with Duplicate Event Days of 30, but when the insurance is called, they advise to call back in 10 days. Task Target Date can be set for 10 days rather than waiting the entire 30 days for the next follow up.
The bottom left side of the form is used to work the task and document what has been completed.
- To utilize the canned text option, select a value from the Notification drop down and select the
 function.
 - To review previously added Notifications, select
 .
.
NOTE: The Notifications (aka: canned text) are created on the Notification Message tab in Administration > Configuration > Workflow Configuration.
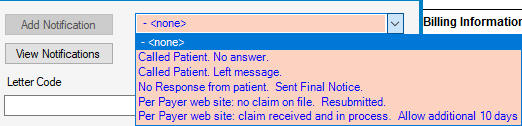
- Letter Code allows the selection of 7 hard coded letters from the drop down:
- WF10001 - Patient 60 Day Delinquency
- WF10002 - Patient Final Notice
- WF10003 - Patient Information Request
- WF10005 - Insurance Claim Appeal
- WF10006 - Patient Final with Credit Card Slip
- WF10007 - Patient 10 Day Notice
- WF10008 - Insurance Non-Payment
- Select
 to create and add to a batch of letters which can then be printed from the Print Letters tab.
 - Select
 to print immediately.

Add Note
This section allows free text notes to be added without opening the View Notes form.
- Visits will default to the visit to which the task was assigned but can be changed by selecting a different visit from the drop down.
- Note Date will default to the current date but can be changed by manually entering a different date or selecting from the drop down calendar.
- Category will default to F- Financial, but a different category can be selected from the drop down.
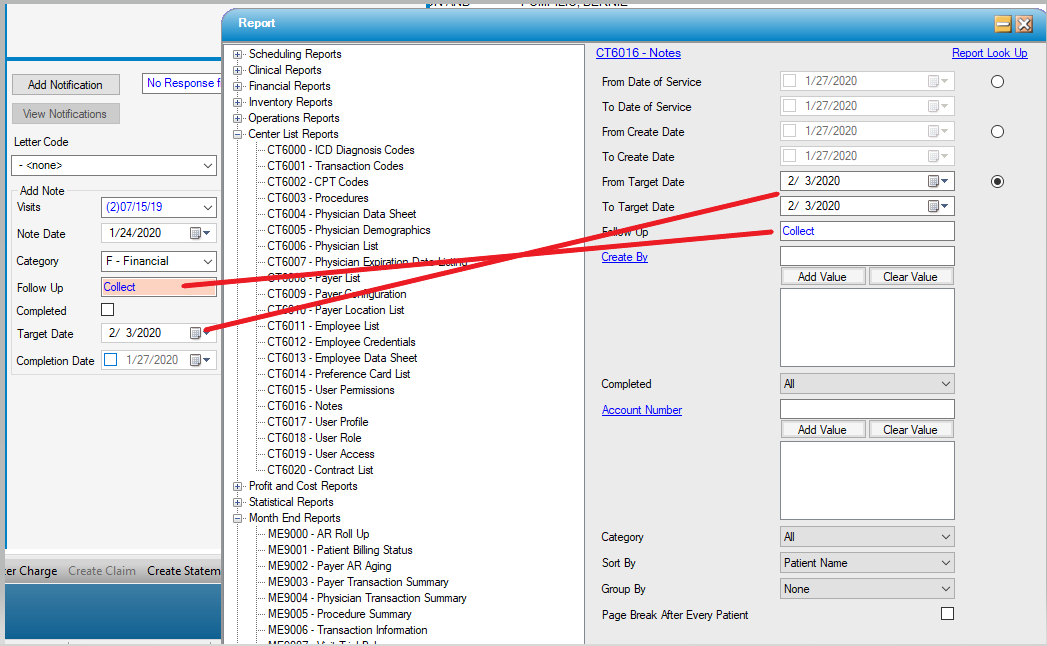
- Follow Up can be used as a memo tickler option. Whatever is entered here can also be entered as the Follow Up in the CT6016 – Notes report to review in report format.
- Target Date can also be utilized to use the CT6016 as a memo tickler. The date will default to 10 days from current date, but can be edited. Example, when sending out Final Notices, set a Follow Up of Collect and a target date 10 days in the future. Then print the CT6016 with this Follow Up and date to review all accounts that were sent a Final Notice today.
NOTE: To utilize the WF10042 - Workflow Note Detail report for documentation of tasks worked, it is necessary to enter ‘WF’ at the beginning of the note.
- To mark the task completed from the report standpoint, select the Completed check box and enter or select a Completion Date in the Add Note section.
- Type Notes in the free text field.
- Select
 function.
The right side of the form consists of a Patient Worksheet which is a complete ledger for the assigned visit. Use scroll bars to scroll down or to the right, or select Resize Worksheet or  to view the entire worksheet. The Worksheet can also be printed from the Print Report drop down.
Multiple functions are available from the main form tool bar.
- To view as icons, right click on the grey toolbar and select Icon Only.

- To view as text, right click on the grey toolbar and select Text Only.

- Any of the functions indicated in the toolbar can be performed directly from the task in the Patient Worksheet tab.
Each of these icons will open the specific patient record to make completing the task easier.
When the task is completed, either mark it Complete or Ready for Review (for supervisor review). The tree view will refresh automatically.
Print Letters
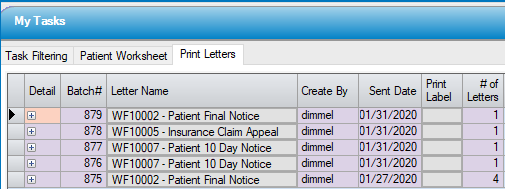
The Print Letters tab will display all letters for which the function was selected.
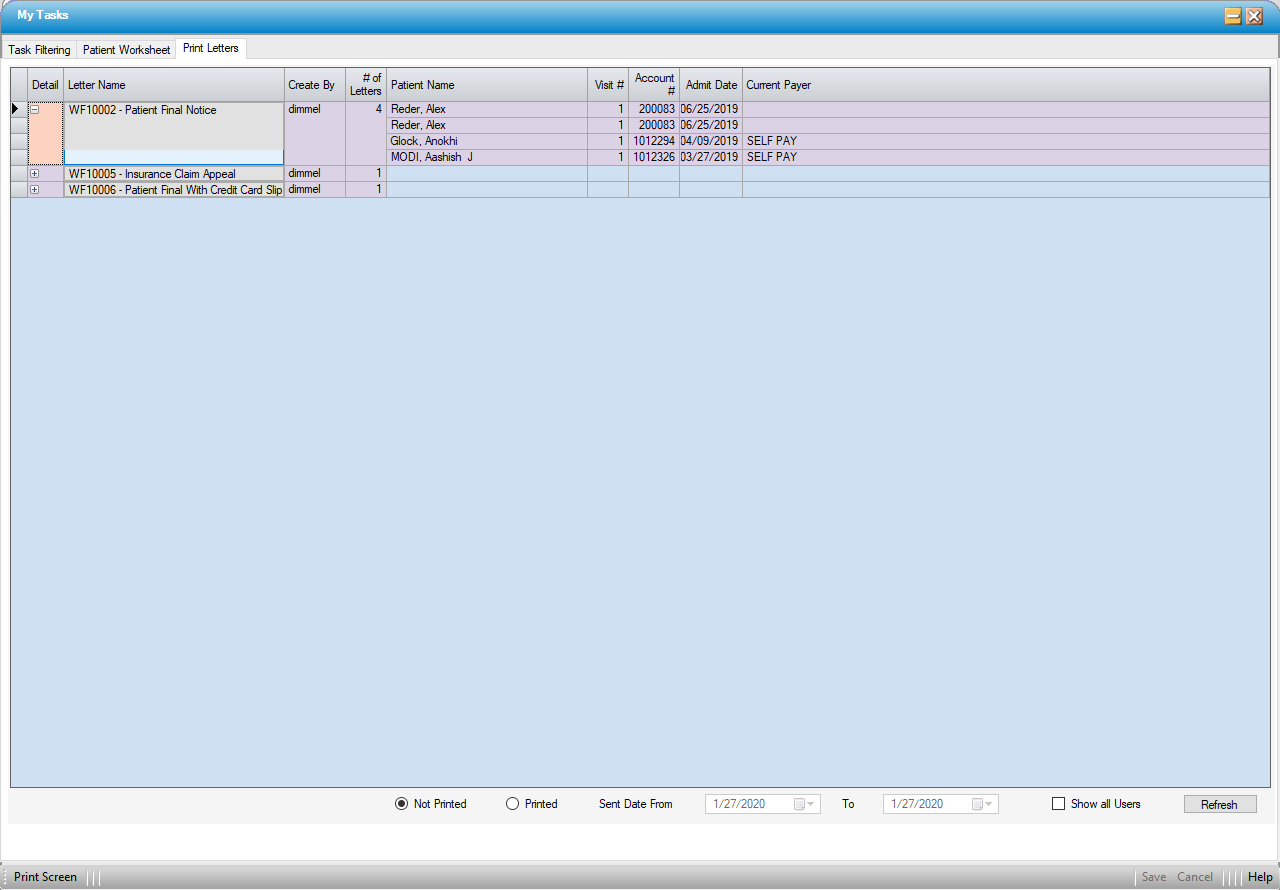
- Records will be categorized by Letter Name.
- Select the beside the Letter Name to view the visits for which that letter will print.
- Select the Letter Name function key to print each batch of letters.
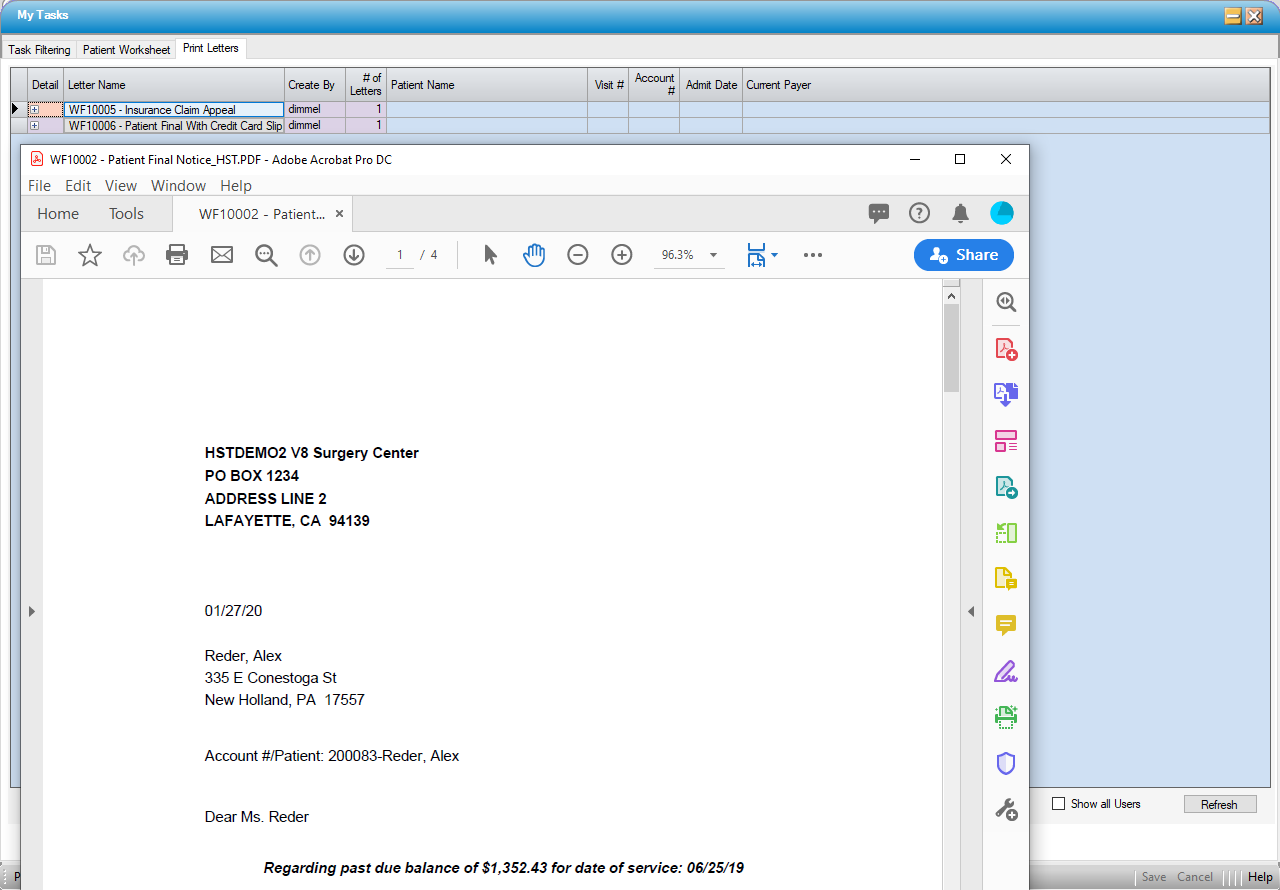
- Letters will generate in PDF format and will be available for on screen viewing prior to printing.
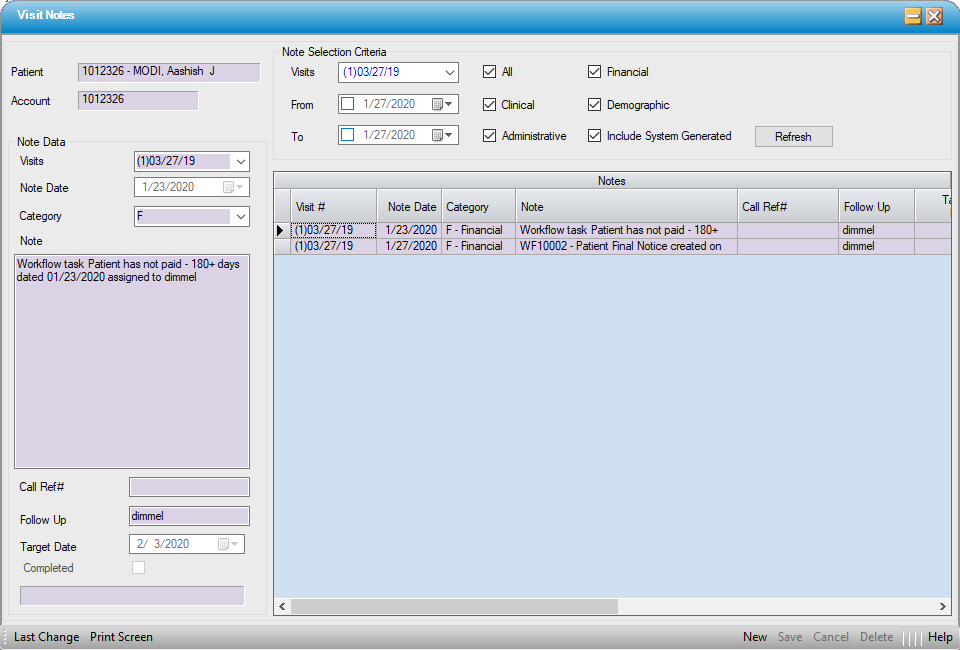
- A Visit Note will be created indicating creation of the letter once the letter has been printed.
NOTE: It is also possible to review what letters have printed for a specific date range or to view letters created by all users. For example, if a center has more than one collector generating letters, selecting the Show all User check box will allow the letters generated by all collectors to be viewed and printed together.
 ]
]
- To print address labels for the letters generated:
- Select the Printed radio dial.
- Enter the date range for the letters printed.
- Select the
 function.
 - Select the Print Label function, as seen below.